1. Navigate to File Explorer and click on “This PC”.
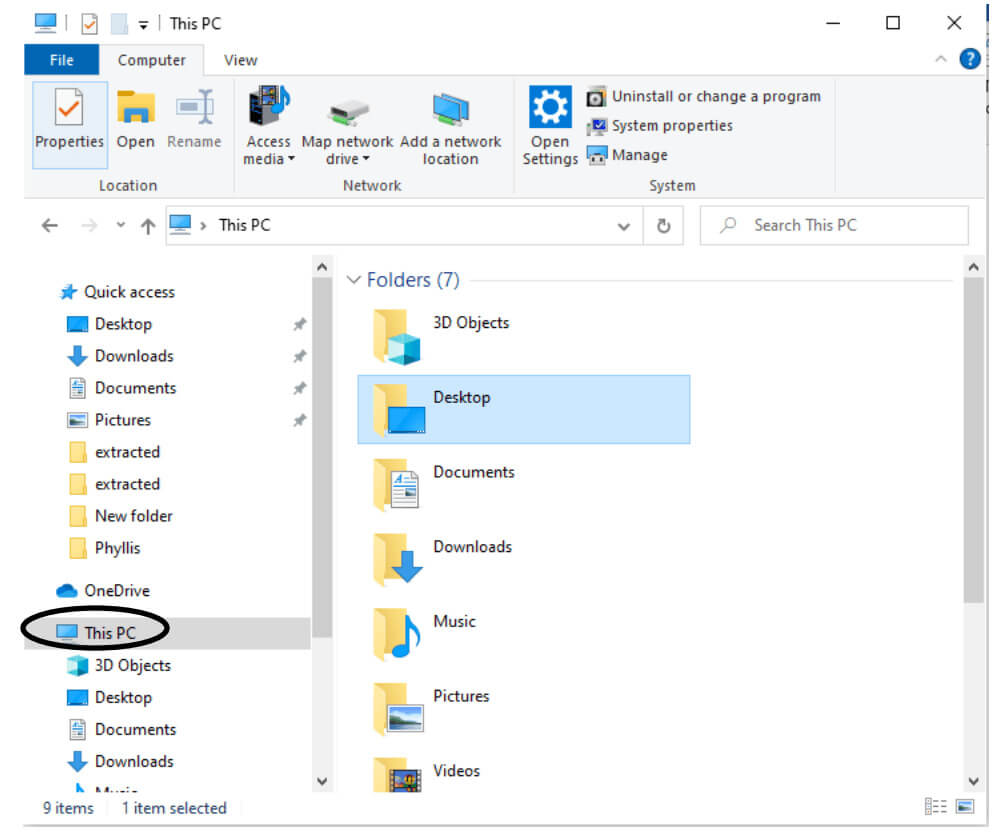
2. Click on “Map Network Drive”.
(It is located under “Computer”)

3. Select the drive you want to map using the dropdown and click “Browse”.
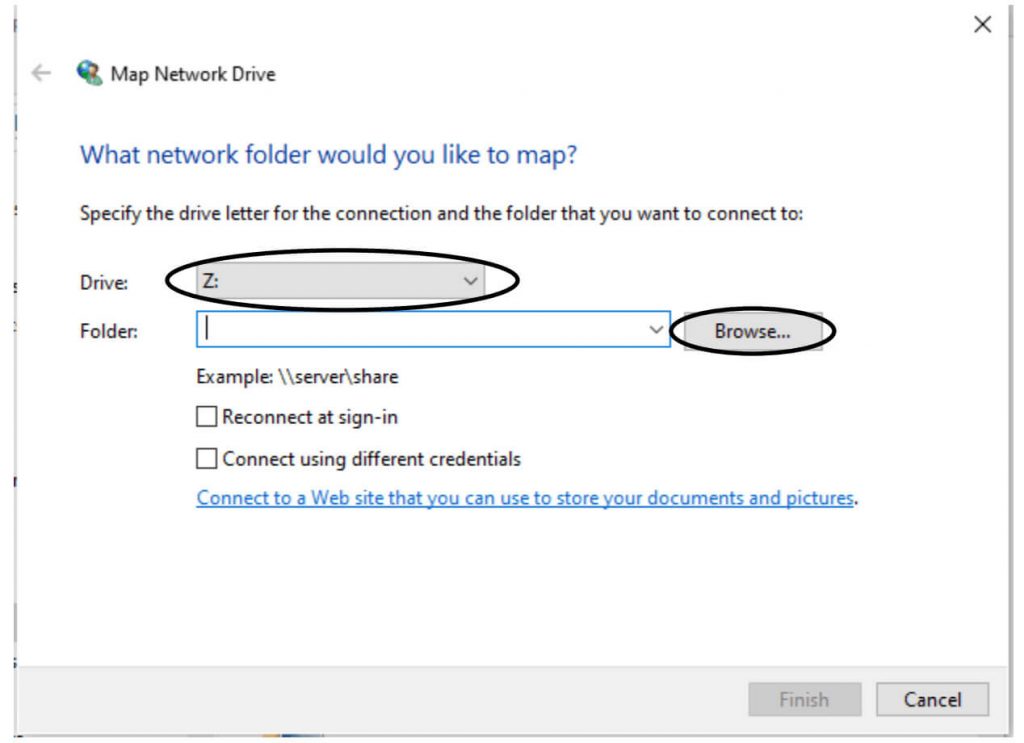
Go to network and find the location (either through Hostname or IP address) provided by your IT admin.
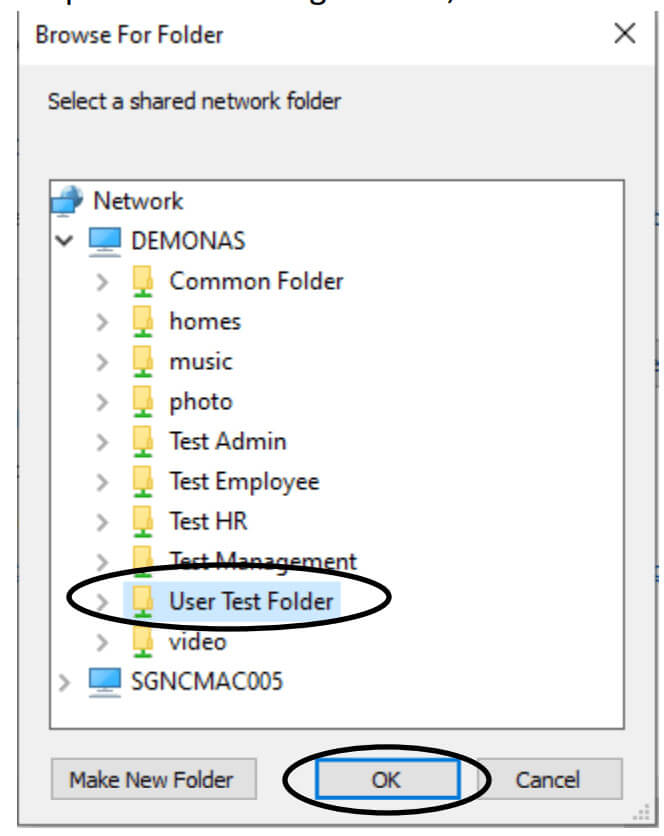
4. After clicking browse, Choose the network folder and click “OK”.
5. Ensure the folder is correct and click “Finish”

If you encounter an error message, please follow the steps below to turn on network discovery:
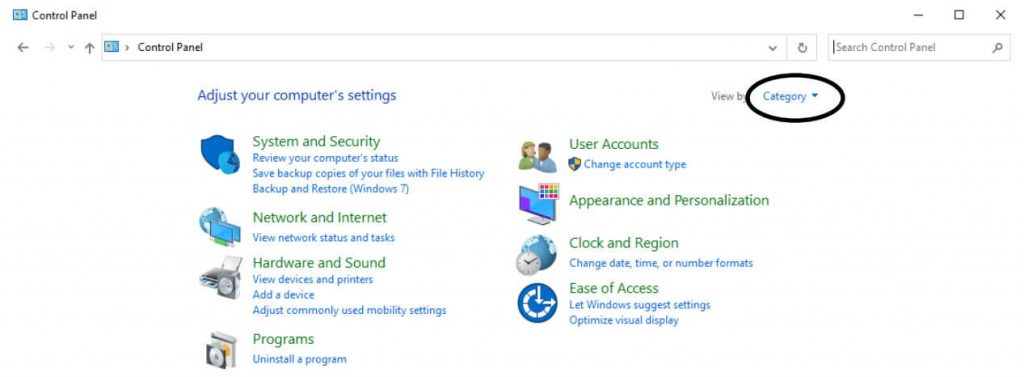
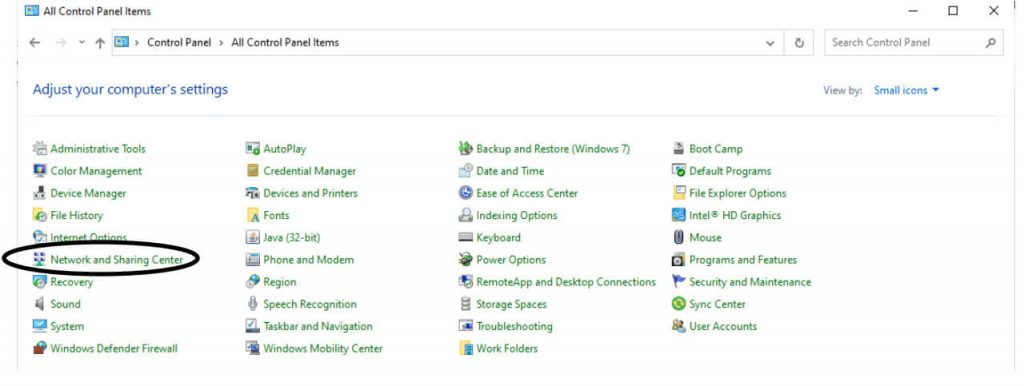
1. Click Start/Windows key and search for “Control Panel”

2. Click the dropdown to sort by “Small Icons”
3. Click “Network and Sharing Center”
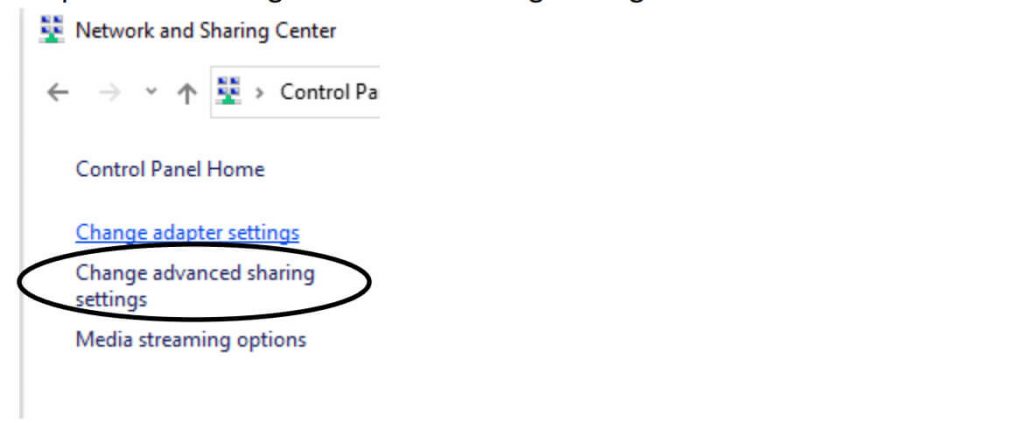
4. Click “Change Advanced Sharing Settings” located at the left-hand side.
5. Click “Turn on” for network discovery and click “Save changes”
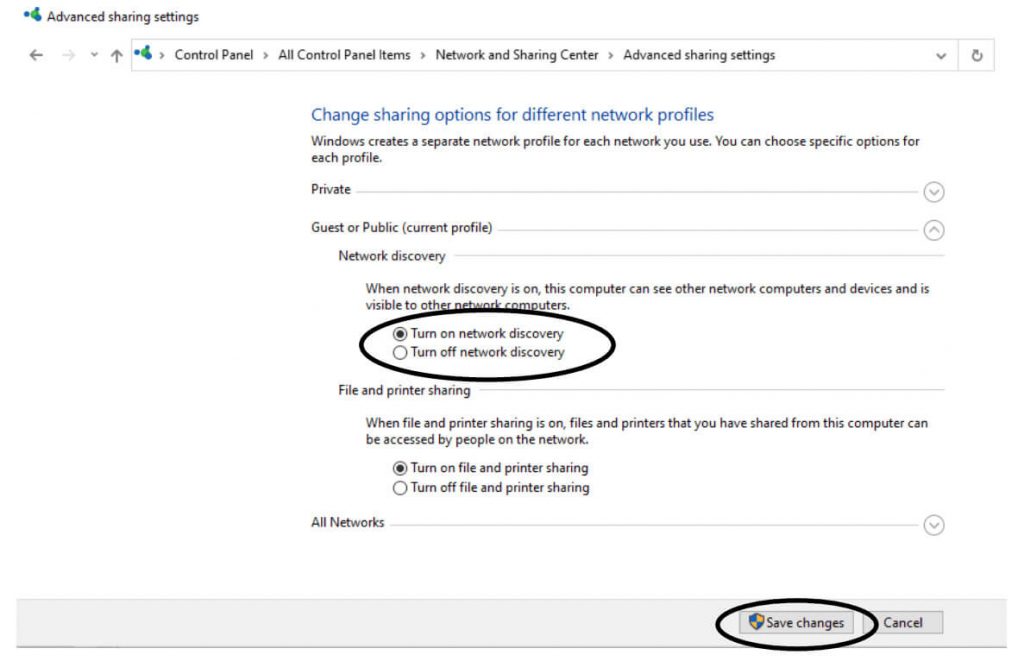
After turning on “Network Discovery”, Repeat the steps above for mapping drive.
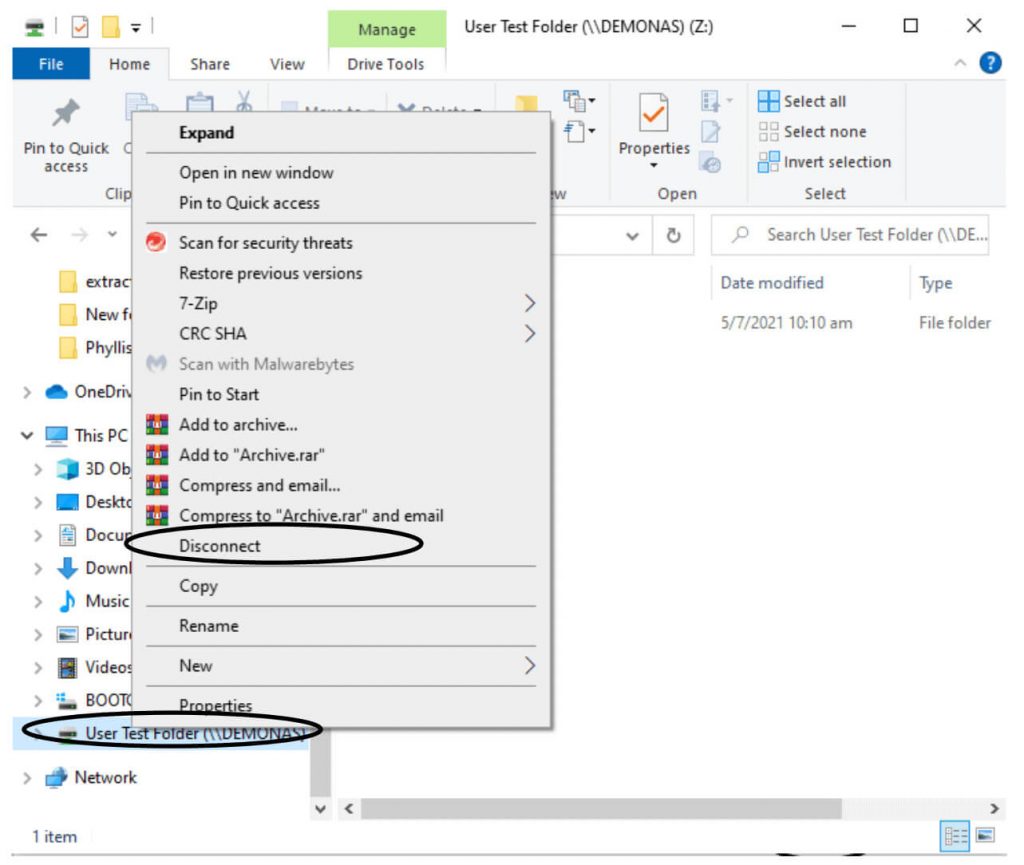
1. To disconnect the drive, right-click on it and select “Disconnect”.
Nucleo Consulting Pte Ltd
ROC: 201214085K
1 Yishun Industrial Street 1 A’Posh Bizhub #06-19 Singapore 768160
Support: +65 6911 0533 (Option 1) / Office: +65 6911 0533 (Option 2)